There’s something almost cathartic about assembling a Lego set. It can be hot and sticky in my house in the middle of the summer, but if I’m fiddling with a Lego set I almost don’t even notice. Considering how unbearably hot and humid it’s been in the north east this summer, it’s a shame I don’t have more opportunities to mess around with a Lego set. Lego presents its own obstacles in that the sets are often pretty expensive and space-eaters. Even if I want something and can afford it, there’s the very real problem of what to do with it after the fact. As such, I try to just to stick to the Disney stuff, in particular anything modeled after an actual attraction at the park. Since finishing the Disneyland Train Station last year though, things have been quiet on that front, but Lego had something in the works I just couldn’t ignore.
It was earlier this year that Lego announced it had struck a licensing deal with Nintendo. This attracted my attention a bit, but I didn’t necessarily expect anything to come of it that would interest me. What I did expect were some Mario playsets, and Lego eventually showed off just that. It’s also not a straight Lego set with Mario themed mini figures, but a bit of an interactive thing where a brickhead-like Mario makes sounds and plays music depending on what blocks he comes in contact with. It’s different, and my son seems to have an interest in it, but it’s not for me. Then Lego went and unveiled something unexpected: the Nintendo Entertainment System.
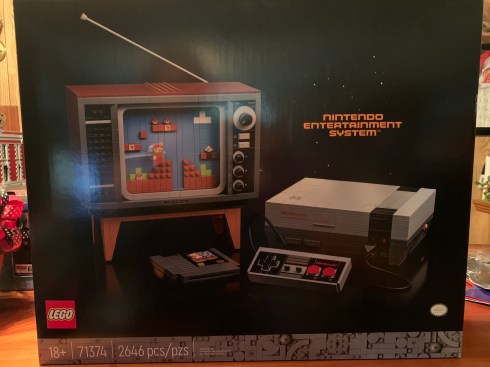
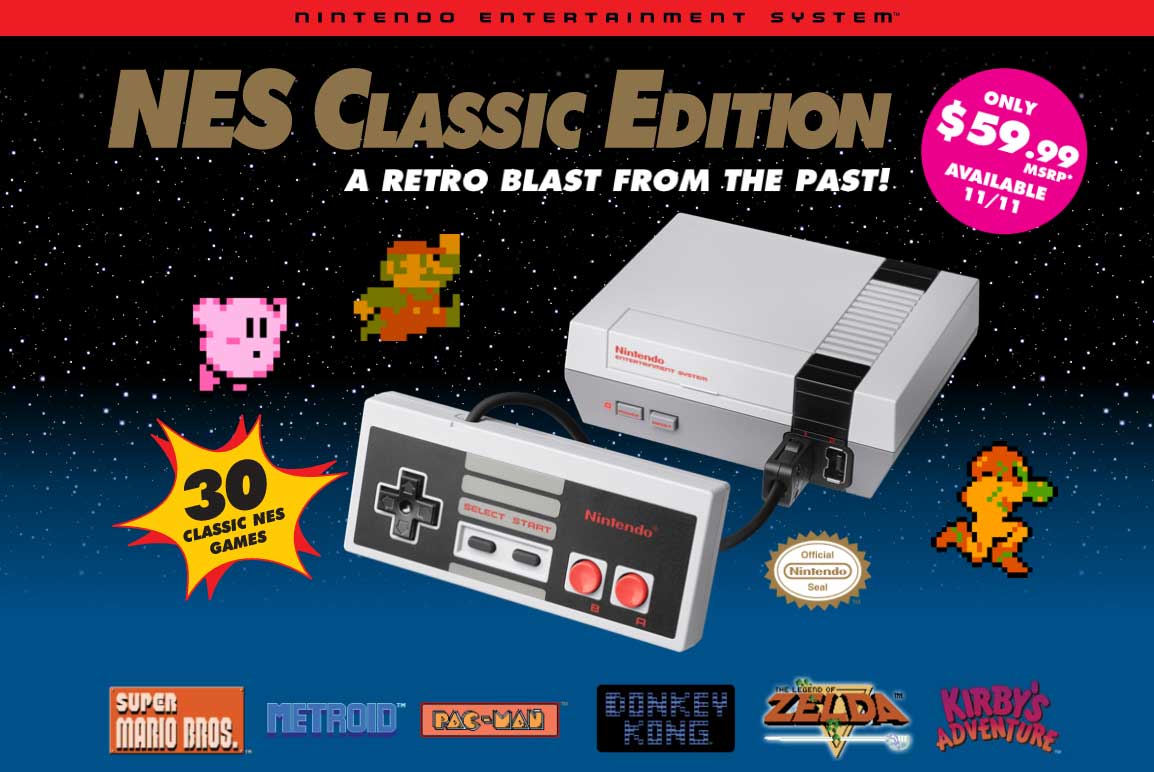
A few years ago, the NES Classic proved there’s a lot of nostalgia surrounding the venerable old machine from 1985. Nintendo couldn’t even keep up with demand initially and people were scalping the 60 dollar item for triple the price for a short while. Because of that, I suppose it shouldn’t have shocked me when Lego unveiled this set which is a brick reconstruction of the NES, controller, Super Mario Bros. game pak, and an era appropriate TV to pair it with. And just a few short weeks later the set was launched on August 1st with an MSRP of $229.99. The 2,646 piece set quickly sold out at retail locations and the online stock has since sold out as well. Worry not if you missed out as Lego plans to continue making more and it’s a safe bet this one will be a popular item this Christmas.
Fearing a sell out, I rather insanely stayed up the night of July 31st just to make sure I got an order in at midnight. The set actually went up for sale a few minutes early and I had my order placed before midnight. This actually worked against me as there was supposed to be a free gift related to the Mario set, but I think that didn’t go live until midnight so my set arrived by itself. Not that it mattered that much as I only want the NES. It arrived at my door just a few days later and it was a bit of a long day with work before I could get to it.


The set arrived in a box larger than I expected. There’s an inner box that contains the first 7 bags of the set (which all relate to the NES itself) and two booklets: one for the console and one for the TV. There are only three stickers included which is fantastic as I loathe placing stickers on Lego sets. The only stickers are the labels for the game cartridge and a faux informational label for the rear of the TV. I decided to build the NES first and was able to complete it in one evening of roughly three hours of build time. Some of that was spent with my five-year-old son which probably slowed me down some, but it still felt rather breezy.
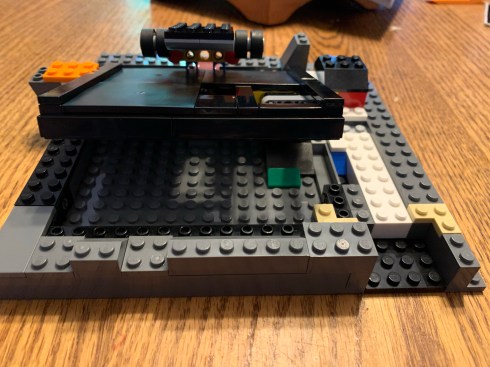

The construction of the NES is rather painless. You’re essentially just building a slightly irregular box so it shouldn’t be hard. The mechanism Lego has you construct for the game-loader is a bit intimidating to look at, but it’s actually fairly easy to install. Lego made use of a special spring-loaded piece to get it right and the end result is actually kind of amazing. It works just like the old console: you insert the game, push down, and it stays down. Push down again and the game pops back up for you to remove.
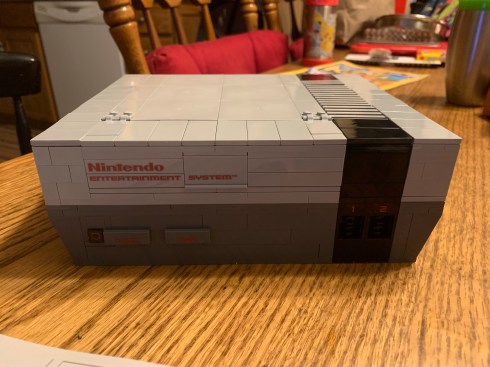

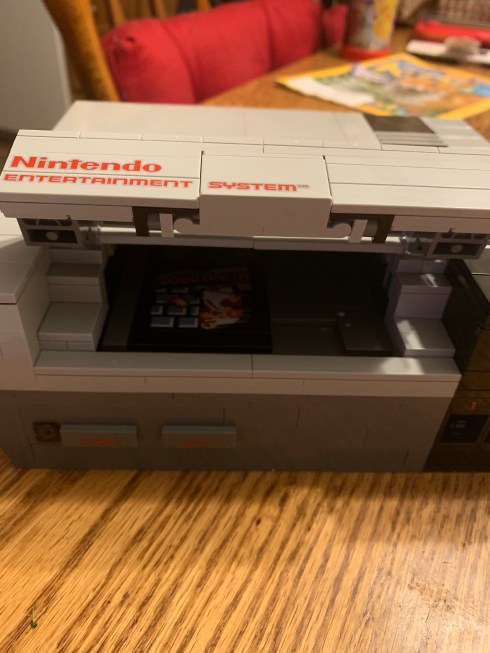
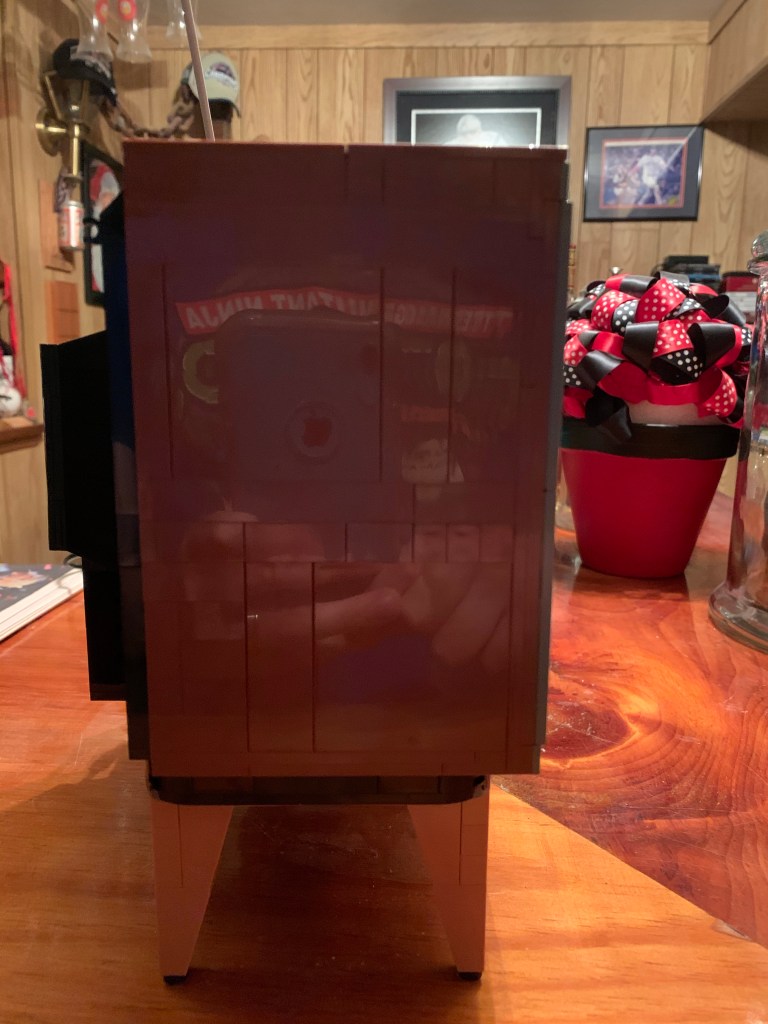
Lego took care to make the outer box look like the real deal. There’s audio and video hookups, a channel changing switch, as well as all of the buttons and cosmetic effects you would expect. There’s the ribbed area of the console’s surface which is an interesting part of the build as well as lots of smooth pieces for the top and sides. All of the logos and words are graphics printed on the piece so they look really sharp. The only thing Lego was unable to hide were the hinges on the front cover, but it’s hardly an eye sore. If anything looks a tad off it’s the front of that cover as it’s done with several pieces so there’s an abundance of seems. It probably could have been done in a cleaner manner, but it’s not as if you’re not supposed to know that this is a Lego creation. Lego also couldn’t perfectly replicate the irregular shape of the NES’s controller inputs, but they did a rather good job with it as-is.


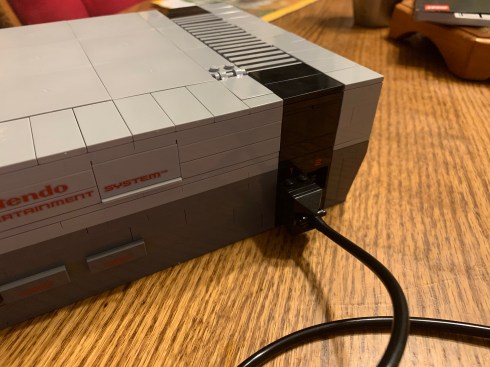
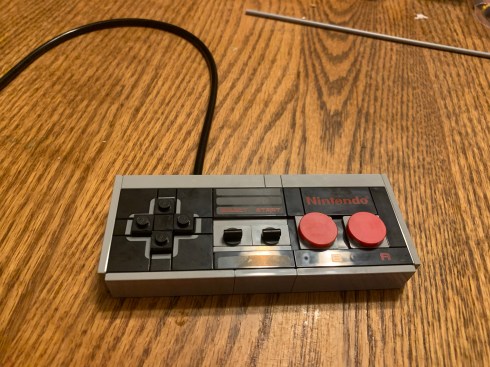
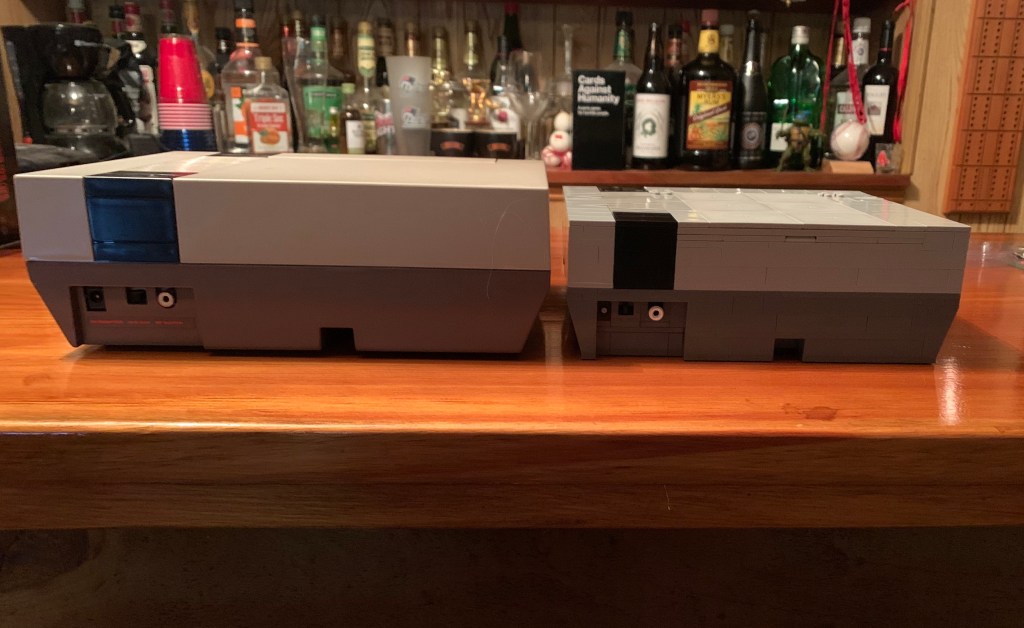
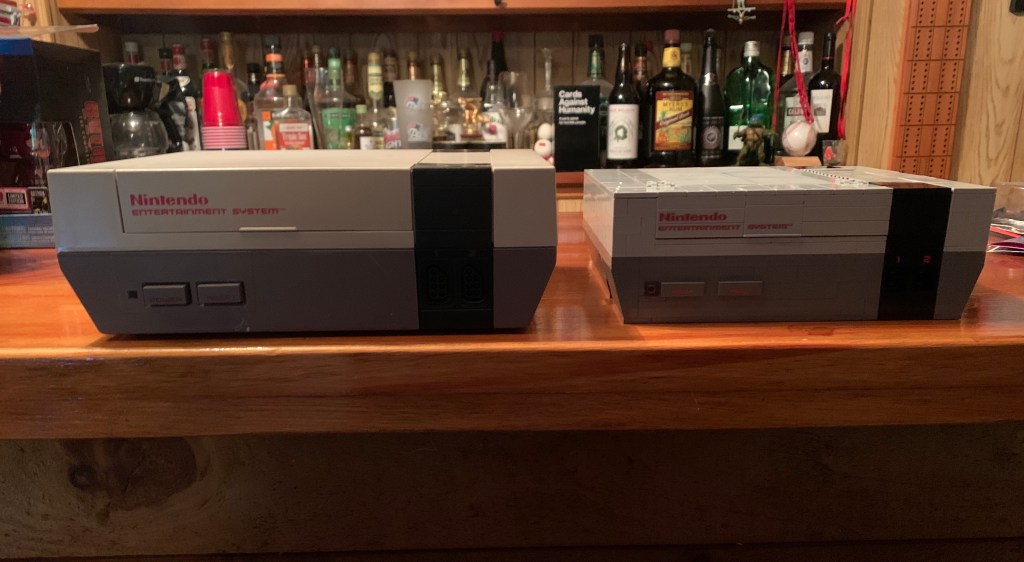
The finished product is smaller than the real thing, but not by that much. I had the original NES, in terms of width, height, and depth as: 10.125″ x 3.5″ x 8″. The Lego version measures out as: 8.125″ x 3″ x 7″. The controller is more 1:1 though the Lego one is a touch thinner. It also isn’t a perfect rectangle as the sides and bottom don’t line up perfectly which is perplexing. I guess they didn’t want to engineer a slightly longer, flat, piece? I don’t know why they couldn’t use existing pieces to get it so that it didn’t have such a gap. It’s minor though, but something that I notice. There are also no working buttons on this thing. They look the part, but don’t function, which I expected but it would have been fun if the A and B buttons on the controller at least were able to be pressed.


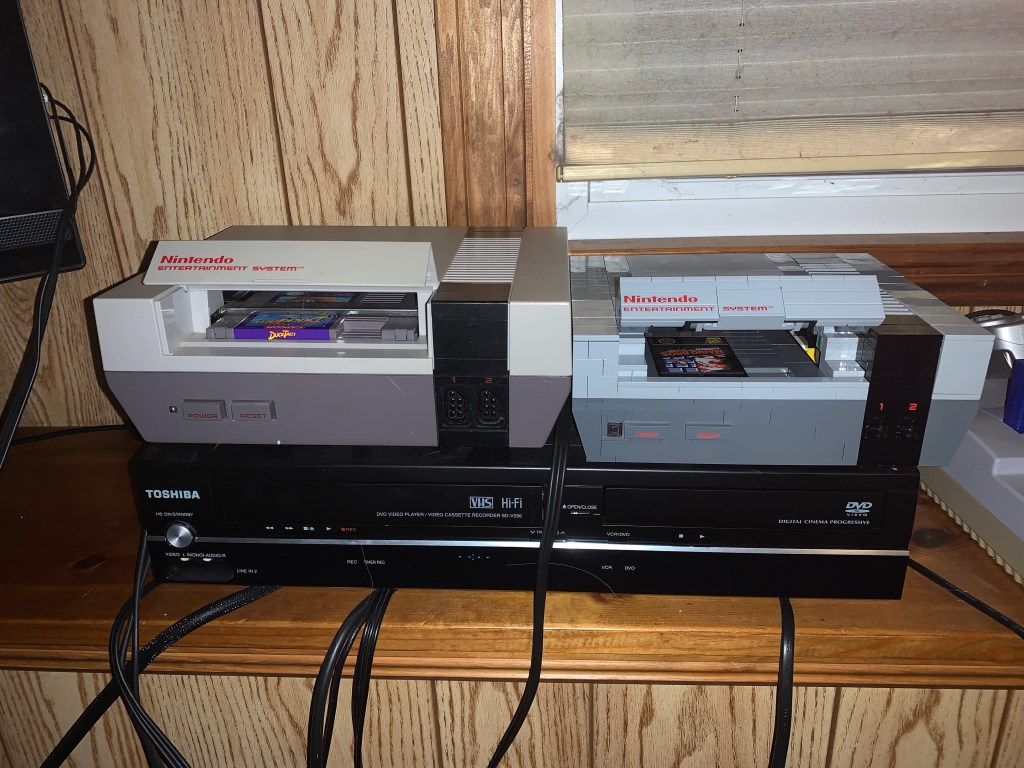
The included game pak, or cartridge, is another thing you have to build. It’s a very quick build though as it’s quite thin and Lego didn’t feel a need to put a proper back on it, so it’s just the underside of the flat bricks used to craft it. It looks the part though and is undeniably cute in the hand. It’s also smaller than the real thing, and if you’re curious, no, an actual game won’t fit in the Lego NES. A traditional cartridge is: 4.75″ x 0.75″ x 5.25″. The Lego version is 3.75″ x 0.375″ x 4.125″. The stickers look great too and since they’re applied to a flat, black, piece it gives you some freedom in applying them. The smaller sticker even includes the Nintendo official seal of quality, an important touch.


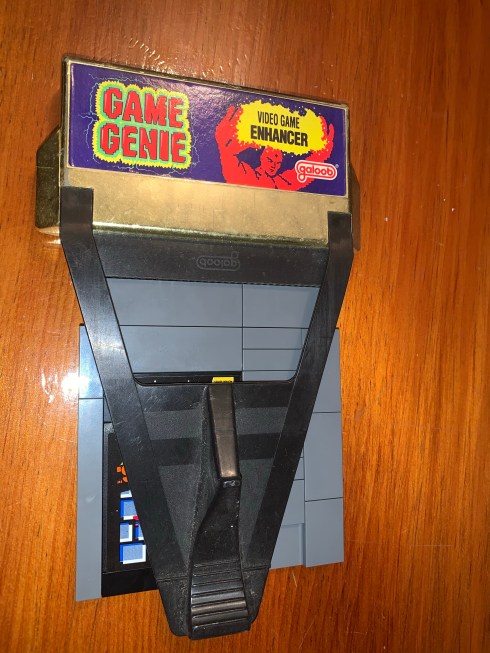
Sadly, not a good fit.
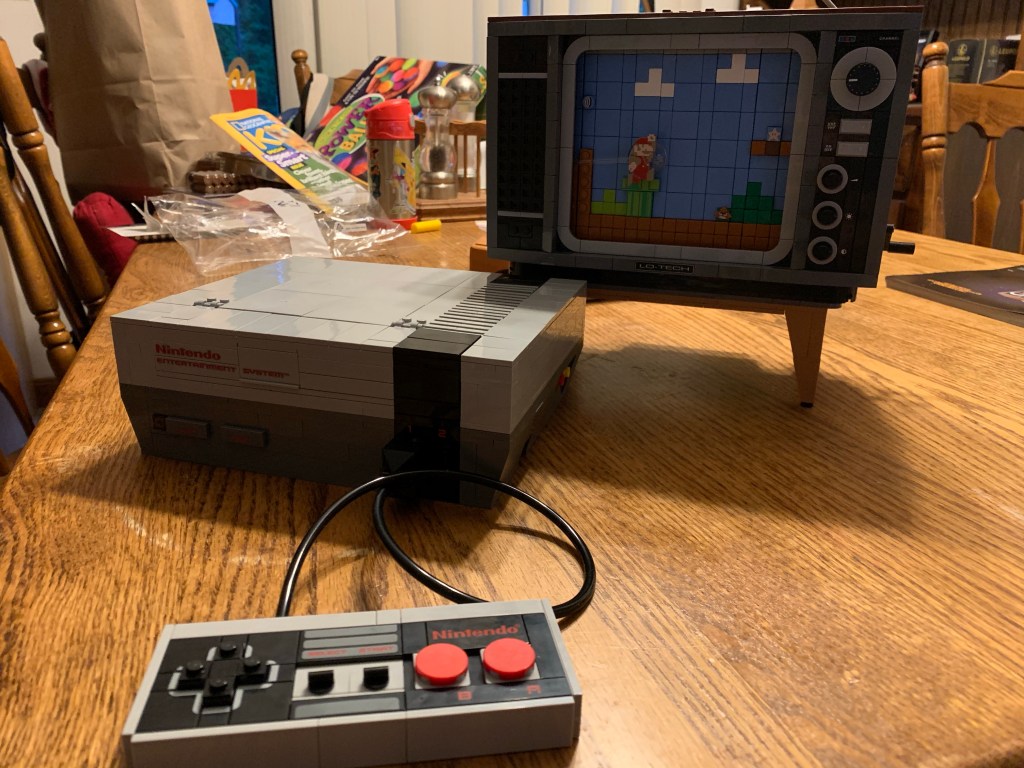
So if you can’t tell, I’m quite pleased with how the NES and it’s components turned out. Since the old Control Deck, as it were called, came with two controllers I do wish this did as well. Since it’s not a functional gaming console though, I understand why it wasn’t exactly necessary to have two. What a Nintendo does need though is a television, because what good is a video game console without video?


Lego could have probably just done the console, and if it were to include a TV it could have just made a big, brick, box. Lego wasn’t content to do that though and wanted to actually simulate a Nintendo game, in this case Super Mario Bros. That’s how we ended up with this rather ambitious television included in this set. It contains more than half of the bricks in this set and is a longer build than the console. The TV is also modeled after the one that appeared in the original instruction manual for the NES, though I am unsure if it’s to scale or not. Regardless, it looks the part of an old TV and has some interesting functionality.


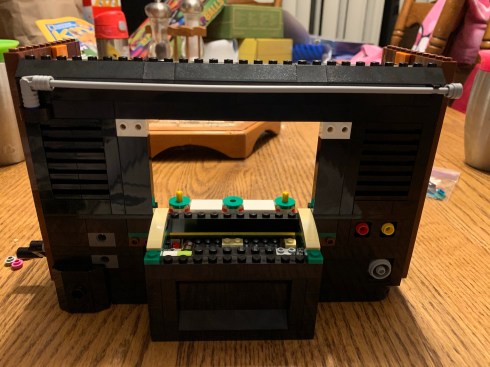

The TV is separated into various build phases. You first start with the base and the “guts” of the device before moving onto the rear and sides. What’s that is complete, it’s time to take care of the screen. See, Lego wasn’t content to just make an era-specific brick-television set to pair with your NES to form a nice display, rather it chose to make this system “playable.” In order to do that, you need to construct a fairly elaborate rotating mechanism with a picture on it all entirely out of Lego. The final product is essentially like those old racing or flying toys in which a picture rotates on a cylinder to simulate movement while the player has a controller or wand with a car or plane at the end of it to move around avoiding obstacles or just keeping the car on the road.

Treads… 
Joiner 
Joiners… 
The “canvas” pieces
In order to do this, Lego basically has you build tank treads, and it’s the section of the build that is the most tedious. There’s a sequence of bags starting at 14 where you’re basically just making one small thing, but over over. The treads are a bag all by themselves as you link them together to make two long treads. You then need to build 15 joiners which are simple, but certainly do a number on your thumbs. You then need to build the plates to place over them which need to snap into place. They’re not all entirely the same as some need a couple of colored bricks affixed to the end which will work with the Lego Mario figure (sold separately).

Once you get through all of that (which comprises three bags, or steps), you’re finally ready to construct the image. Using mostly flat tiles, you build the scenery of Super Mario Bros. There’s lots of blue and brown tiles as well as some studs. You could conceivably ad-lib this part if you wanted to and create your own background, but it’s meant to be constructed in a specific way to work with the previously mentioned Mario. Lego is generous with the special pieces like the goomba, turtle shell, etc. as they’re small, flat, pieces that could be easily lost. You have an extra of each. The graphics printed on them look great, though the mushroom and goomba shape are a little off since they use a tiny “pie slice” piece. They’re still easily recognizable and are probably my son’s favorite part of the set. This was also a great part to have him help me with since it’s basically just laying tiles.

Little hands like helping with this part. 
This little car is what the scenery wraps around. 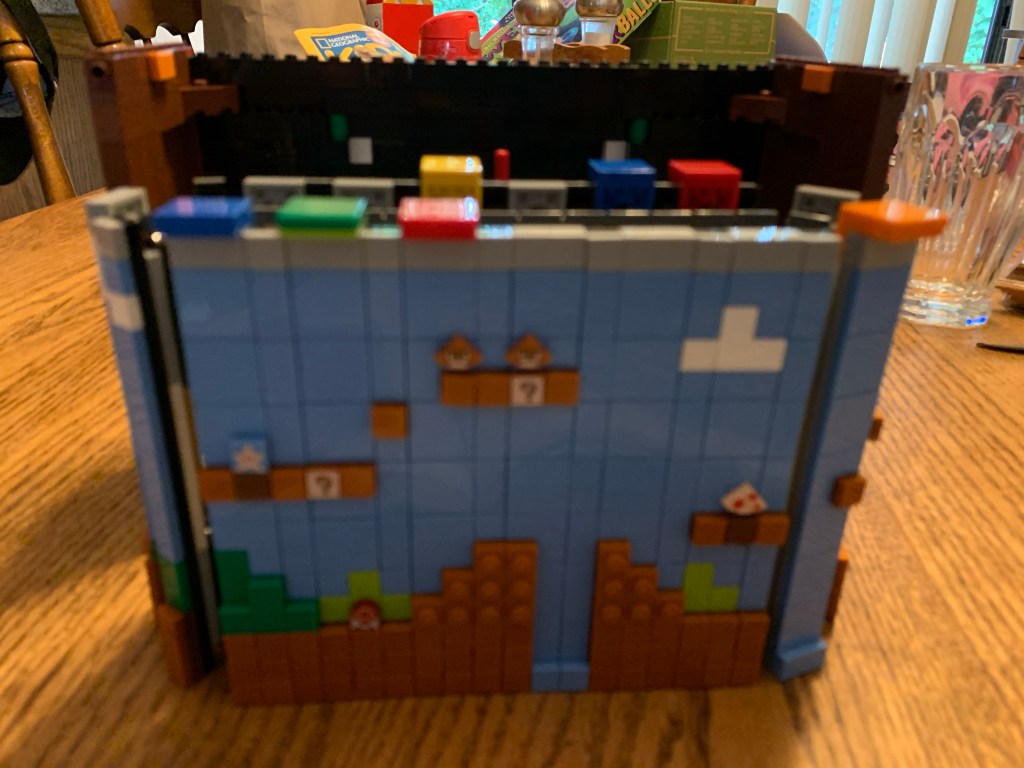

The colored tabs work with the optional Mario figure. 
He’s so cute!
Once the scenery is constructed it has to be wrapped around a little “cart” the set has you construct which then gets placed inside the TV. It’s a touch challenging to get the scene to hook to itself as there isn’t a ton of give, but it wasn’t as bad as I though it might be. Inserting the finished diorama into the TV was also exceedingly simple even though there’s a lot going on. The only part I didn’t like was the little cap Lego has you build to put on top of it as it’s not engineered as well as it could be. There’s a little gap in the piece itself because of the bricks chosen and when snapping this into place it can come undone. This piece isn’t crucial, and after a few tries I just let it be even though I’m pretty sure one side wasn’t snapped together as well as it should be. It’s basically just a spacer between the mechanism and the top of the TV. Mario is added before the next step and he’s a cute little tile all on his own screen-printed to resemble Super Mario from the original game. He’s affixed to a transparent rod (the same one that came with the Ghostbusters Fire House for the flying ghosts) with a spherical, bubble-like piece behind Mario to guide him over the obstacles.


After that is done, the only thing left was to assemble the front of the TV and the bottom leg supports. This was an enjoyable build that comes together pretty fast. Lego was creative with the television dial by using a gear that just rubs a soft, plastic, green, rod to create a clicking sound when the dial is turned. My kids were quite amused by that and even more amused that this is how a TV was once operated. There are more tiles with graphics printed on them for things like volume control and even a UHF toggle. The last step is to create the TV stand which is rather simple. The finished product rests on top of this with some bricks placed on the bottom of the set used as guides so while it doesn’t snap in place, it fits into a track of sorts so it’s not wobbly.
With the set complete, you’re free to experience what it offers. Turning the crank makes the scenery move and Mario will just slide over it. This means he has only one path and you don’t want to try and force him to go higher than intended or else you risk jamming the mechanism. My son did this as he wanted Mario to stomp more goombas and got it stuck. I had to pop Mario off and some of the other pieces to get it going again. I didn’t have to resort to this, but in hindsight it’s nice Lego includes extra tiles for goombas, turtle shells, etc. in the event one were to pop off and fall into the TV it could just be replaced rather than disassembled to dig out one little tile. It works as advertised though and my kids though it was pretty fun.

Of course, you may be aware that this set contains an additional function. If you purchase the new Super Mario Starter Course set from Lego it comes with a Mario brickhead-like figurine. This figure has some electronics built into it that causes it to change facial expression and also output sound. If you happen to have this guy you can place him on a special tile on top of the television to start him up, then move him to the edge of the screen. When you crank the handle, the colored tiles on the edge of the track alert the Mario figure to what’s happened on the “screen” and he’s supposed to play the proper sound. If Mario stomps an enemy it should make that “pop” sound or if he hits a question mark block that unmistakable sound of a mushroom rising up will play. I went ahead and purchased the set for my son, as it’s more of a toy than a display set. It works as advertised, though I had to update the firmware on the Mario figure via the special app Lego launched specifically for the Mario brand. It’s a neat feature, but not worth $60 for adults who just want to experience the music from the game with this set. The Mario figurine atop the TV doesn’t really complement the aesthetic this set is going for, and the Starter Course is a play set as opposed to a display piece by itself so there’s nothing to gain from owning both aside from getting sound effects into this set. As a result, I cannot recommend it. Though if you want it for your kid, mine seems to love it, so there’s that.

If you lack the Lego Mario figurine, one substitution for him is the 2020 Hallmark NES ornament which plays sounds from the game. My kids didn’t notice the sounds didn’t sync with the TV and didn’t care as one would turn the handle and the other would hold the Lego NES controller and pretend to play. The console doesn’t physically hook-up to the television, you’re just supposed to place it nearby to complete the look. And this works fine. If the TV didn’t have the image built onto it you could probably fool someone from a distance as Lego really nailed that old school look of a television. And the NES is also quite convincing, especially to people who haven’t looked at a proper console in 30 years.
I am quite tickled by how this set turned out. It was a really fun build, even with the tedious portions of the TV, and was rather frustration-free at that. I love the look and functionality of both the TV and NES. When I first saw this set, and how much it cost, I was a bit grumpy they included the TV as a lone NES would have been much cheaper, I’d wager. However, now that I have it built I’m a little torn on what part is my favorite. The TV is so well crafted and so fun to play with that I can’t imagine the set without it. I’m even curious if Lego will do more with this design. While I have little desire at the moment to build another track, I’d probably have to consider it if Lego released additional games for this thing. Side-scrolling Zelda, or maybe Lego would challenge itself with a vertical scroller? And then there’s the Mario sequels or Duck Hunt with Zapper. I’m not expecting any of that, but it also wouldn’t shock me to see it happen. By itself, this set is a blast for nostalgia junkies like myself. If you can get your hands on it (it’s currently sold out, but it will be back) I wholeheartedly recommend picking it up.


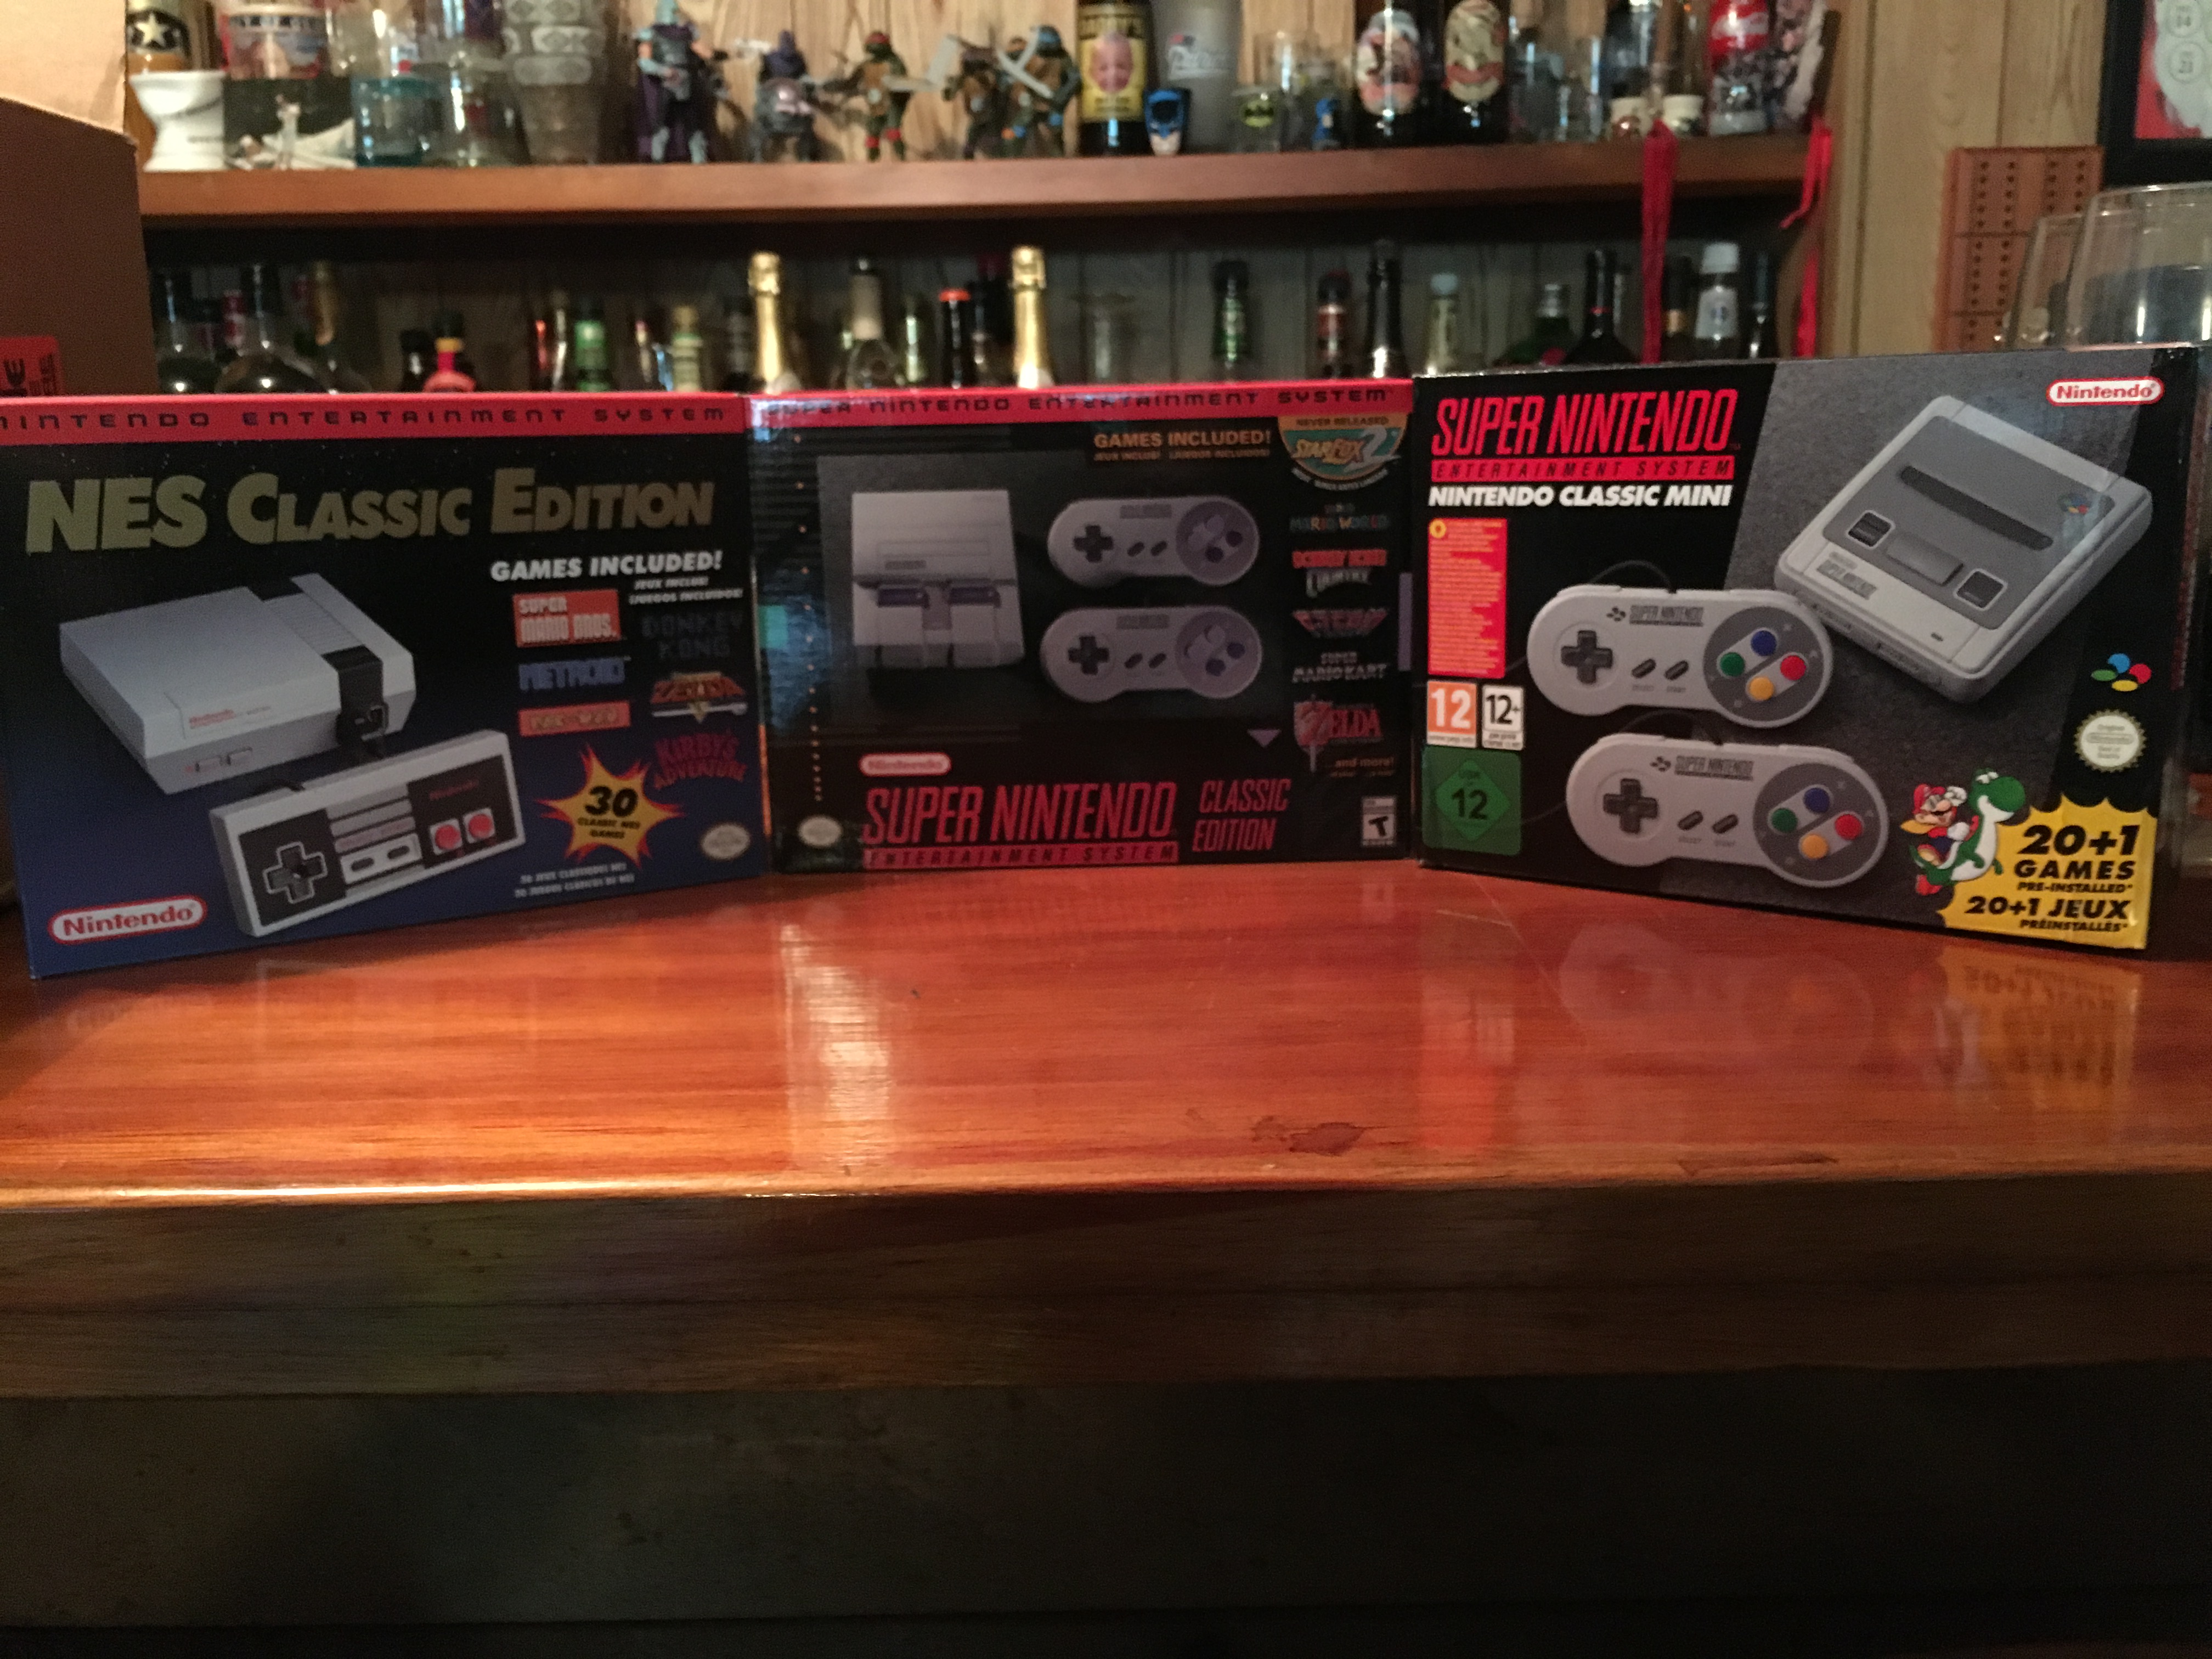 Both editions of the SNES Classic are, naturally, pretty cute. Like the NES Classic they’re tiny and are closer in size to a game cartridge for the original system than the old system itself. They’re light, and pretty simple devices. Both feature working power and reset buttons that function the same as the ones on the original consoles. The eject buttons and cartridge door are non-functioning, and the there’s a little snap-off piece where the controller “ports” are that pop off to reveal the actual controller ports for the Classic edition. In the box, both units come with two controllers, an HDMI cable, and a micro USB cable. The US version has a USB to wall adapter that the UK one lacks, but any such adapter will work. The US version also comes with a poster with instructions on the reverse side while the UK version comes with an instruction manual designed to mimic the original. The UK version also comes with My Nintendo reward points, I’m not sure why the US version does not.


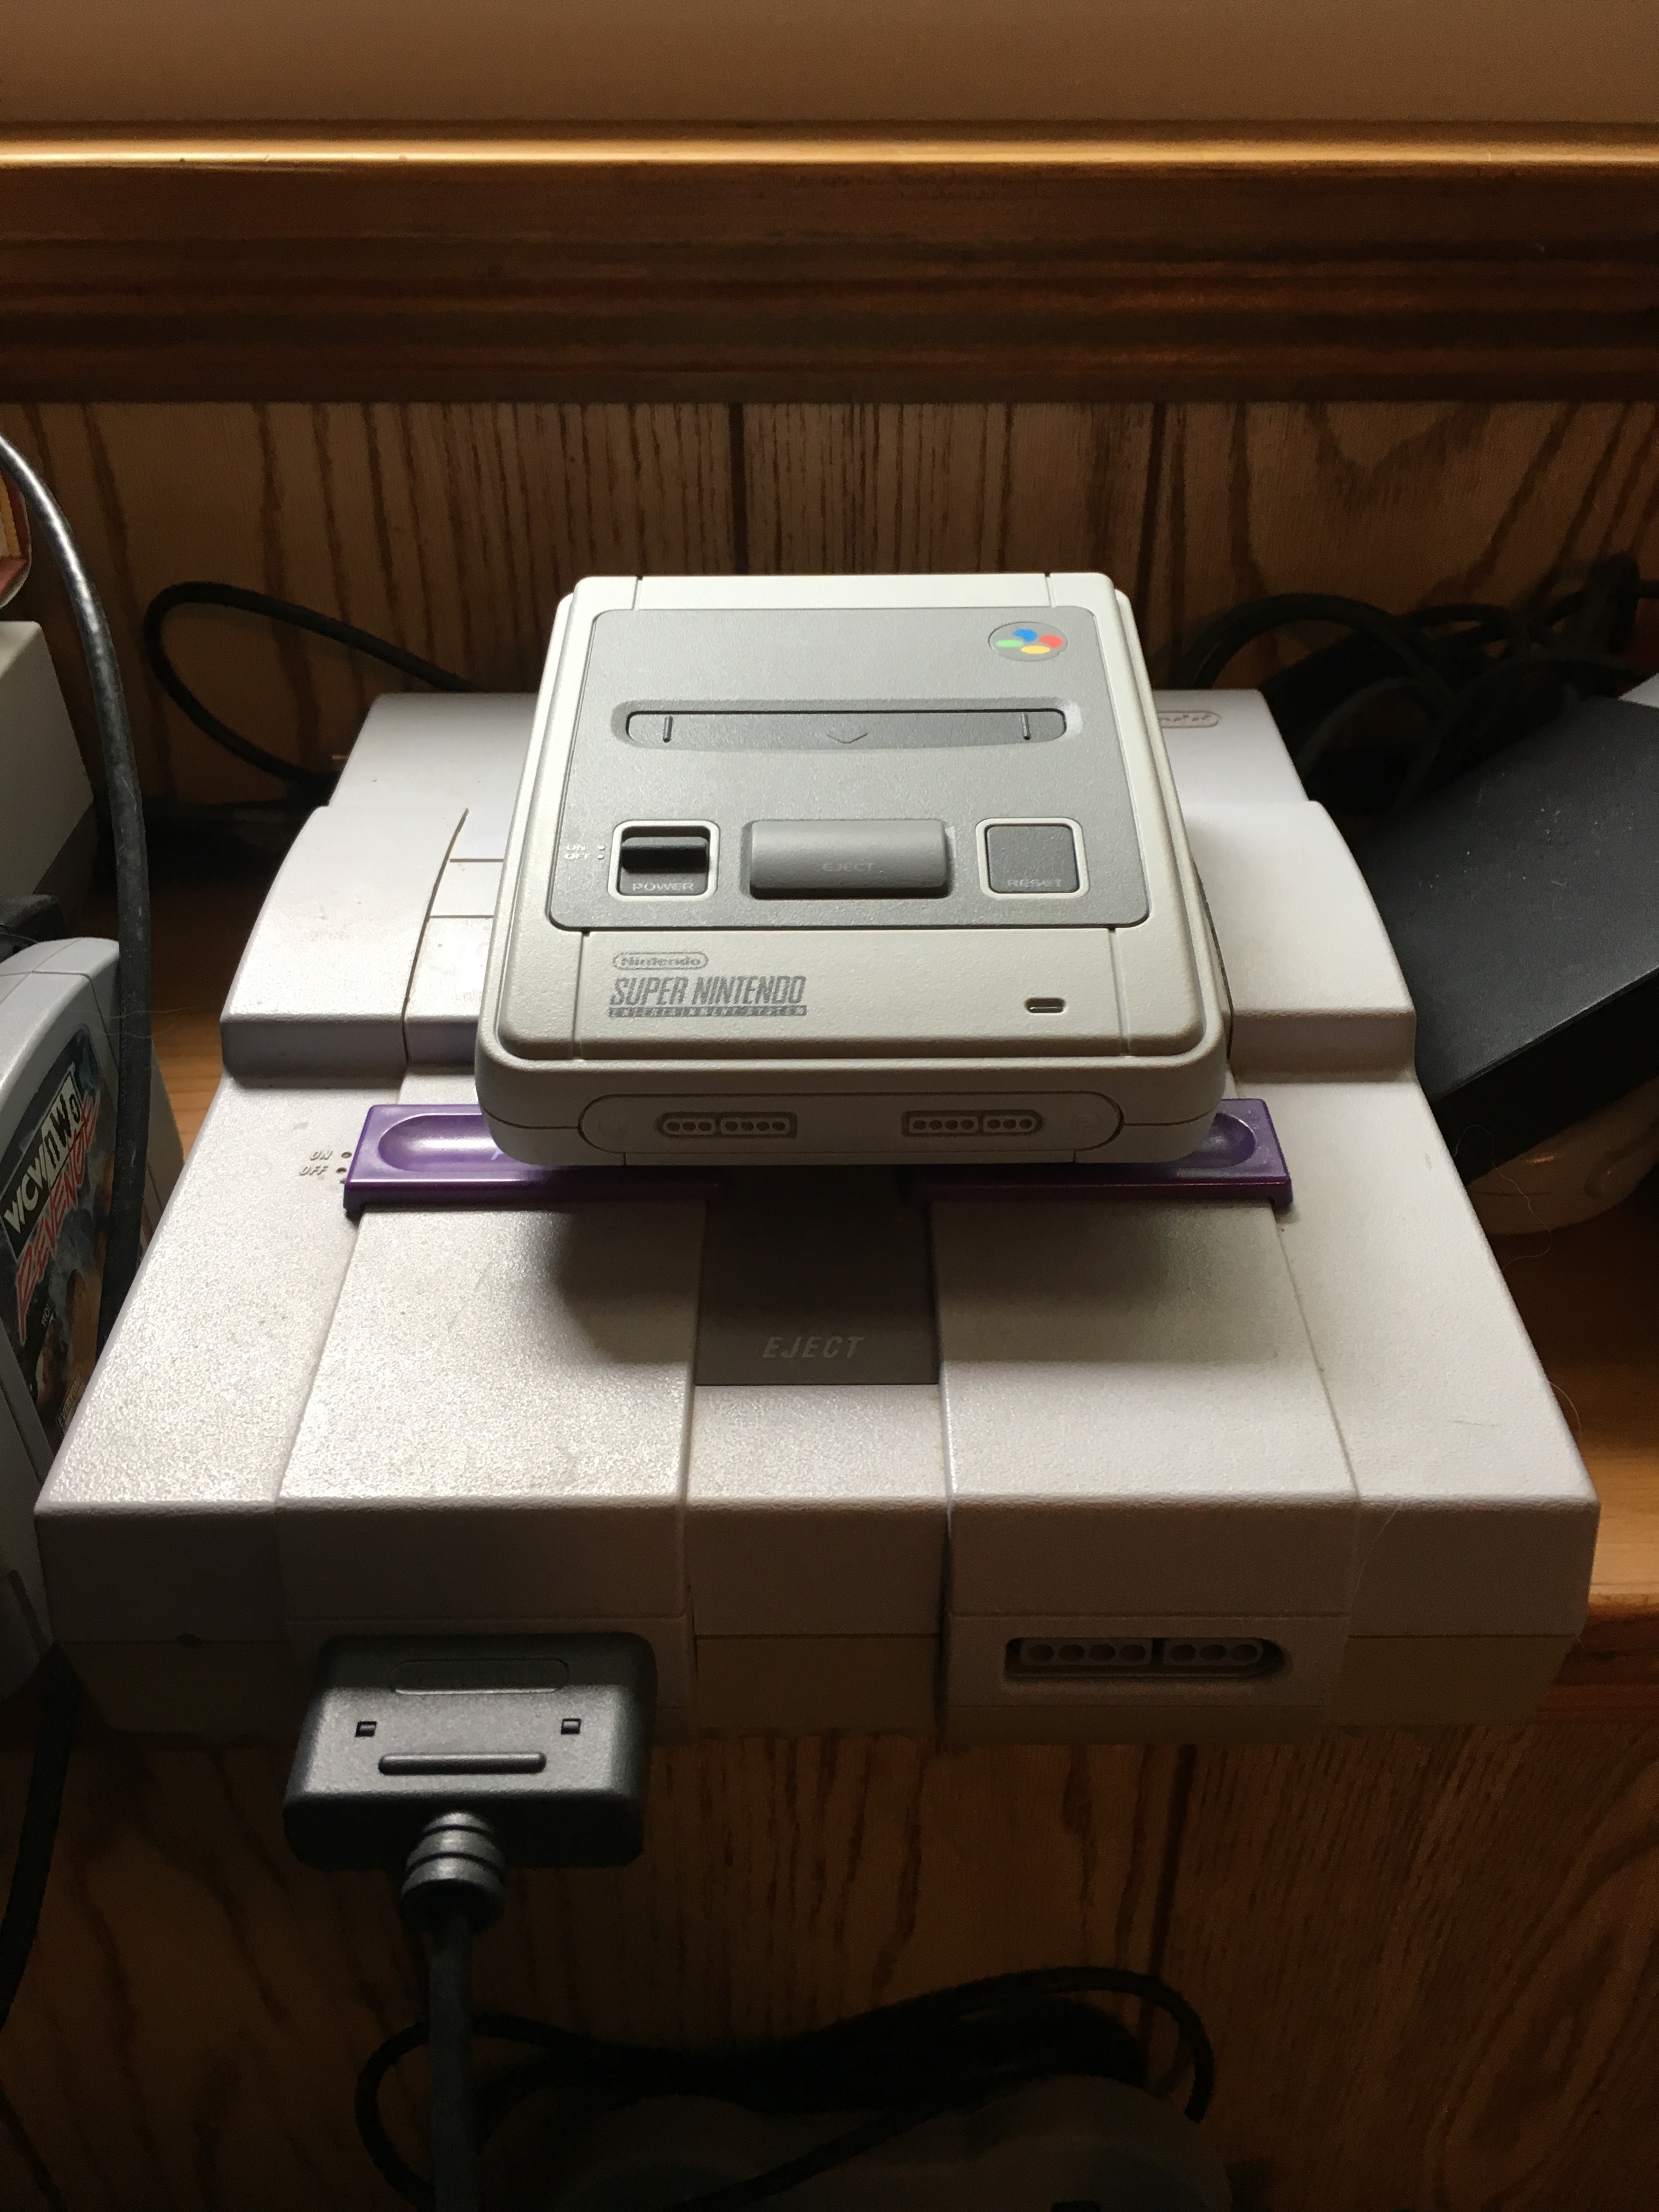 If you’re still unsure I can safely say the SNES Classic is worth the 80 dollar price tag Nintendo has placed on it. It’s a great little machine full of some truly excellent games, some of which would cost you hundreds to purchase on the secondary market. Like the NES Classic, it’s also not something you need to drop hundreds of dollars on to own so if you’re still looking for one I encourage you to be patient and not feed the scalpers. For now, Nintendo is claiming these will be shipped in abundance so hopefully they’re sincere and these are attainable for everyone who wants one. They’ll probably remain hard to get through the holidays, but if Nintendo keeps supplying them past 2017 they should get a bit easier to track down. If you live in an area with Amazon Prime Now, keep an eye on their social media accounts as it seems like they’ll be selling these exclusively through that service as well through their few retail locations and that truck thing they do. Supposedly, people who were able to pre-order through the US Amazon site are still waiting for them to be fulfilled. Meanwhile, Amazon’s European web stores seem to be getting stock regularly for their versions and most ship to the US. Sometimes they claim not to (when I pre-ordered my UK edition it said UK only, but it still went through), but will ship anyways. Just make sure to select the global shipping option, if offered. You’ll pay a few more bucks, but it might be worth your while, especially if you’re like me and prefer the UK look of the console.

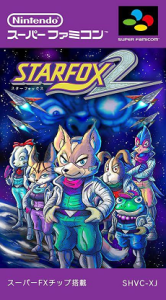 #21 – Star Fox 2* (2017)
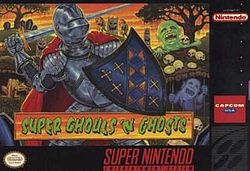 #20 – Super Ghouls ‘n Ghosts (1991)
 #19 – F-Zero (1990)
 #18 – Donkey Kong Country (1994)
 #17 – Super Punch-Out!! (1994)
 #16 – Contra III: The Alien Wars (1993)
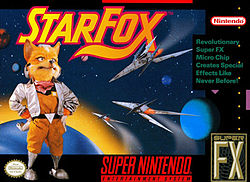 #15 – Star Fox (1993)
 #14 – Super Mario Kart (1992)
 #13 – Kirby’s Dream Course (1994)
 #12 – EarthBound (1994)
 #11 – Kirby Super Star (1996)
 #10 – Street Fighter II Turbo: Hyper Fighting (1993)
 #9 – Secret of Mana (1993)
 #8 – Super Castlevania IV (1991)
 #7 – Super Mario RPG (1996)
 #6 – Super Mario World 2: Yoshi’s Island (1995)
  #5 – Mega Man X (1993)
 #4 – Super Metroid (1994)
 #3 – Final Fantasy III (1994)
 #2 – Super Mario World (1990)
 #1 – The Legend of Zelda: A Link to the Past (1991)


 If you read this blog even semi-regularly, you’ve probably seen me talk about the NES Classic already. When it came out

 As I sit down to write this entry, it is March 1st and we are less than 48 hours away from the launch of the latest piece of Nintendo hardware: Nintendo Switch. It’s an important release for Nintendo as the last console, the Wii U, was a commercial failure. That being so, the Wii U is a bit of an anomaly as Nintendo has been a respected manufacturer of video game hardware for decades. Nintendo’s journey has been a memorable one, starting with playing cards and low-tech plug and play devices to the Game and Watch series, which set the stage for Nintendo as both a game developer and eventually console juggernaut. As such, Nintendo is synonymous with video games (at one point, the word Nintendo was often used by parents as a catch-all term for gaming system) and it’s hard to imagine they’ll ever leave the industry, but if the Switch is a flop then that could be a real possibility.


 Part 2 of this ranking feature for the games in the Legend of Zelda series should be less controversial than Part 1. Hopefully that doesn’t make it boring because we are just about at that point with this list where I’m splitting hairs. It’s probably not really a spoiler to say that the top 2 Zelda games are not really in question, and I think for many, the order is mostly agreed upon. I also think the next two games on our list are pretty clearly inferior to what follows, though some of that does depend on what your appetite for retro gaming is (suffice to say, if you were born sometime after 1990 the order of the following games is probably different from mine). Let’s move along though to take a look at these prestigious games which made it deep into the top ten.
 8. Oracle of Seasons (Gameboy Color 2001)